SureFox makes it very easy for the device administrators to configure the Allowed Websites
Just follow the steps below to add allowed websites in SureFox:
1. Access SureFox Settings screen by quickly tapping on Back Button or tap on the screen 5 times within 3
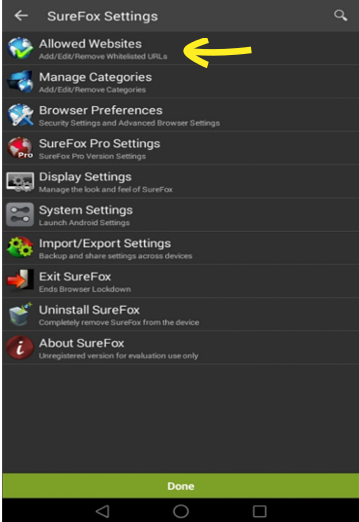
2. Tap Allowed Websites
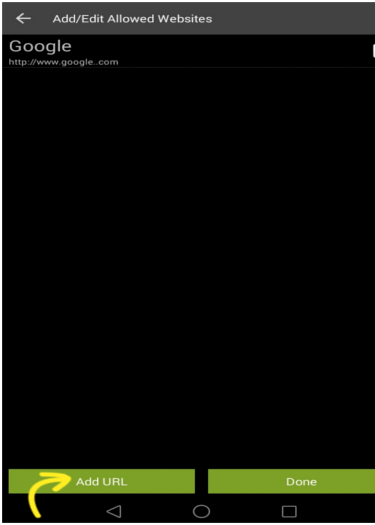
3. Tap on Add URL
4. Enter Website Details
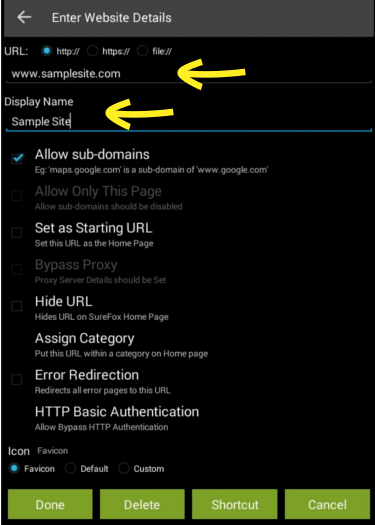
i. URL: Select the URL type:
- http : Select if the site uses the http:// protocol
- https : Select if the site is a Secured Site(SSL) and uses https://
- file : Select if the site is stored on the device's storage memory
ii. Display Name: The name specified here is displayed on SureFox homepage for the allowed URL
iii. Allow sub-domains: Select this option if you wish to allow all the sub-domains of the allowed URL. For example: If you have selected www.google.com as the allowed URL, then allowing the sub-domains will provide access to all sites hosted under *.google.com such as maps.google.com, mail.google.com and so on. However, note that allowing sub-domains do not allow sites with same domain name but with different extensions such as google.co.in or google.co.uk
iv. Set as Starting URL:
v. Hide URL: If the Hide URL
vi. Assign Category: Assign an allowed website to a category of your choice. Categories in SureFox can be managed from Manage Categories
vii. Error Redirection: Enable this setting to redirect any network error to this page. It allows you to display a custom error page if any site is down due to the network problem. Note that only one site can be set as Error Redirection page at a time.
viii. Icon: Lets you to choose the display icon for each allowed URL on SureFox homepage
- Favicon : Fetches favicon from the site dynamically
- Default : Displays a globe icon for the site
- Custom : Manually specify an image file
5. Tap Done
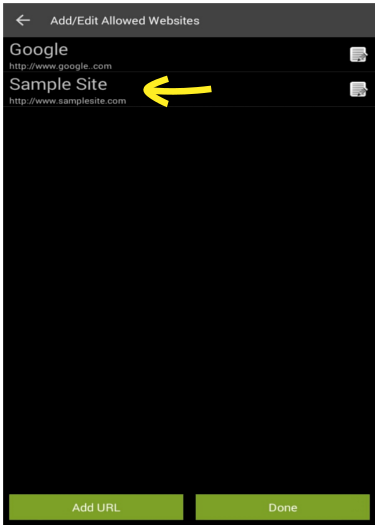
6. Repeat the steps to add as many allowed sites and that's it, user will be able to access only the sites you allow and restrict the rest