
Dedicated devices (formerly known as COSU or Corporate-Owned Single-Use) are business-owned Android smartphones that are optimized and deployed for a single, specific function. It could be a locked-field device for the mobile workforce, a portable point-of-sale device, or even a digital kiosk for your business that the company controls more than the device users (or employees).
SureMDM now provides a simple method for enrolling, deploying, and managing such business-owned Android devices via a dedicated device profile using the Android Enterprise platform. A range of features can be remotely deployed for secure mobility and mobile app management when these devices are configured to the Dedicated Devices profile.
Purpose
The purpose of this knowledge article is to provide a guide on how to support Dedicated Devices (COSU) with Android Enterprise using SureMDM.
Additional Information
- To enroll an Android device in SureMDM using Android Enterprise i,e QR code and Device Policy Controller ID (afw#suremdm), please refer to this article.
- To use Android Zero Touch Enrollment in SureMDM, please refer to this article.
- To set up Samsung Knox Mobile Enrollment, please refer to this article.
Steps
There are two ways to enroll SureMDM account with Android Enterprise:
- Using a Gmail Account.
- Using a Managed Google Account.
The following steps are involved in enrolling in SureMDM with Android Enterprise:
Using a Gmail Account
Step 1: Enroll Android Enterprise in SureMDM.
- Login to the SureMDM Console.
- Go to Settings and further to Account Settings.
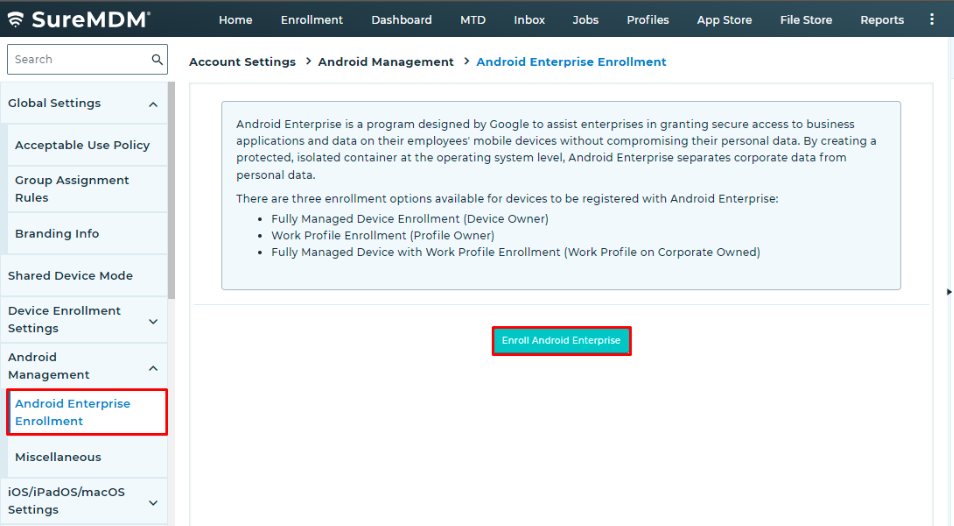
- Click on Android Management and select Android Enterprise Enrollment.
- Click Enroll Android Enterprise.
- On the Enterprise Enrollment prompt, select Google Play EMM API.

- Next, select Enroll Using Your Gmail Account radio button

- On the Google Play screen, click on Get Started and login with the Gmail account.
- Enter your organization name in Business Name and click Next.
- In the Contact Details screen, enter the details, check the Agreement Declaration, and click Confirm.
- Click Complete Registration.
- Navigate again to the Android Enterprise Enrollment section to view the enrollment status and details.
Step 2: Activate Android Enterprise’s Dedicated Device profile on the device.
- Take a new device or factory reset the existing device.
- On the Language page, select the desired language and tap Start.
- Connect the device to the Wi-Fi network.
- Next, on the Add your account screen, enter the keyword afw#sureMDM in the Email section, and tap Next.
- Next, go to Google Services and Accept to go to the next screen.
- On the Android for Work screen, SureMDM Agent will be listed, click on Install.
- SureMDM Agent will start downloading.
- On Android Enterprise Configuration, select Skip Encryption and tap Next.
- On the Set Up Your Profile screen, tap Set Up.
The device will enter kiosk mode with the SureMDM Agent application.
Using a Managed Google Account.
Step 1: Enroll a SureMDM account with Android Enterprise using Managed Google Account.
- Login to the SureMDM Console.
- Go to Settings and further to Account Settings.
- Click on Android Management and select Android Enterprise Enrollment.
- Click Enroll Android Enterprise.
- On the Enterprise Enrollment prompt, select Google Play EMM API.
- Next, select Enroll Using Your Managed Google Account radio button.
- Enter the Google Managed Domain and EMM Token and click Enroll.

Note: Click here for details on how to generate an EMM Token.
- Copy the generated token and paste it in the EMM Token field in the SureMDM Console.
- Android Enterprise will be enrolled in the SureMDM web console.
Step 2 : To activate Android Enterprise’s Dedicated Devices profile on the device using Managed Google account.
- Take a new device or factory reset the existing device.
- On the Language page, select the desired language and tap Start.
- Connect the device to the Wi-Fi network.
- Tap Accept and Continue to use the same settings.
- Enter domain details (Username and Password) and tap Next.
- Go through the Terms of Service and select I agree.
- On the Google Services screen, select the required options and tap Next.
- On the next screen, the SureMDM Agent application will be listed. Click on Install.
- SureMDM Agent will start downloading, and on the next screen, click Install.
- On Android Enterprise Configuration, select Skip Encryption and tap Next.
- On the Set Up Your Profile screen, tap Set Up.
- Launch the SureMDM Agent app in the same window, and it will automatically enroll and show as Online in the Agent.
Android Enterprise also offers BYOD features to improve Android device usability, security, and flexibility in the business environment.
Please refer to this article to learn more about SureMDM’s BYOD options.
Need help? CONTACT US