
You can use the 42Gears Analytics Engine (built into the SureMDM web console) to track, monitor, graph, and format analytics data. This includes data obtained from iOS and iPadOS browsing activity on 42Gears’ secure browser, SureFox.
Steps to create Custom Reports for iOS and iPadOS device browser activities
1. Log into the SureMDM Web Console.
2. Click Account Settings and select Data Analytics.
3. Enter Analytics Name, Tag Name as url_host and click Add Field to select report fields.
Example: A Field is a value that the analytics report measures. This includes device name and time, for example. As each field adds a new column to the analytics report, adding more fields results in a more comprehensive report.
4. For each field, enter Field Name, select the Field Type and click Add.
5. Click Save and then Show to view the Secret Key that you will use to authenticate the profile- make a note of the secret key in a safe place. Then, click Save.
Note: The Secret key is the authentication key which extracts the browsed data from the browser to display in the data analytics report.
6. To apply the settings, click Apply at the bottom of the screen.
7. Click Jobs > New Jobs.
8. Select iOS as the operating system.
9. Select Data Analytics Policy as the Job type.
10. In the Data Analytics Policy window, enter a Job Name and the Secret Key which is the authentication number generated in Step 5.
11. Go to the SureMDM Home and select the device(s) or group(s).
12. Click Apply to launch the Apply Job/Profile To Device prompt.
13. In the Apply Job/Profile To Device prompt, select the newly created Data Analytics job and click Apply.
14. Now go to Reports, select Custom Reports and click Add.
15. Add a Name and Description and select the created Fields from the Tables List and add it under Selected Tables List. Click Save to save the customized reports.
Note: Analytics reports will be updated every 12 hours.
16. To select the created report for a desired device, click On Demand Reports and Select the report.
17. Click the device icon to select Device or Group of Devices.
18. Click Request Report to generate the report. Once the job is deployed, SureMDM will record device analytics data when a user browses anything.
19. Go to View Reports to download or view the custom report.
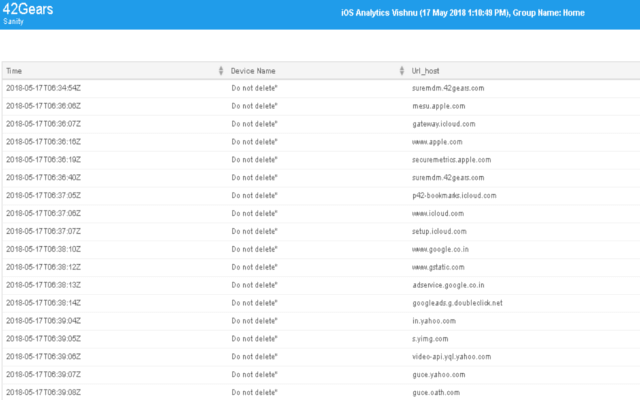
Here’s a Sample Report.
Note: This feature is supported only for customers who have Enterprise licenses for SureMDM. Additionally, devices must be supervised and run iOS 11 or later (or iPadOS 13 or later).
Make smarter business decisions with data-driven analytics. Try analytics features in SureMDM for free.